
Friday, September 21, 2012
Colorful Image Text Effect
PREVIEW
 In this tutorial, we’re going to make a typographic poster from a simple photo using Photoshop techniques. I haven’t done something like this before despite the fact that I started doing typography both in GIMP and Photoshop. Filling out an image with different fonts appears so cool to me and it inspires me to do one.
The described effects look nice on portraits or any other images with good contrast and light background, but you can easily adjust the contrast and make the background lighter using the different tools and filters in Photoshop.
Click here to view my complete tutorial.
In this tutorial, we’re going to make a typographic poster from a simple photo using Photoshop techniques. I haven’t done something like this before despite the fact that I started doing typography both in GIMP and Photoshop. Filling out an image with different fonts appears so cool to me and it inspires me to do one.
The described effects look nice on portraits or any other images with good contrast and light background, but you can easily adjust the contrast and make the background lighter using the different tools and filters in Photoshop.
Click here to view my complete tutorial.
Tuesday, July 31, 2012
Wrinkled Text Using Displacement Map
Preview of the Final Result
 In this tutorial you will be able to learn how to use the displacement map in making an interesting text effect. You'll discover how the text goes along with the wrinkle of the paper, and it's another idea you'll surely add to your arsenal of knowhow in Photoshop text effects.
Step 1 : Open the image you’ll be using for the text. Here, we’ll be using the wrinkled paper texture below. You can download the image HERE.
 Step 2 : Go to the Channels palette and select which of the RGB has the greatest contrast. In this case, I selected the Green channel which gives the best result. Duplicate this channel by right-clicking it and select Duplicate Channel. A Duplicate Channel dialog box appears. Name the duplicate channel as Map, and under Document, select New.

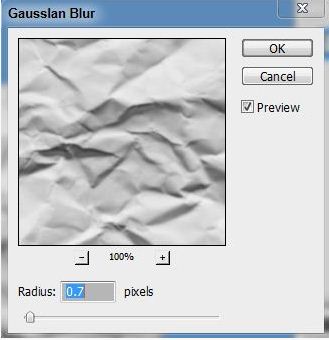
 Step 3 : The new image that appears as a result is a black and white. We will use this as our displacement map. Smooth this via the Gaussian Blur (Filter>Blur>Gaussian Blur…), and set the blur value to 0.7 pixel. Save this to your hard drive and name it Map.psd. Close this image for now.

 Step 4 : Switch back to Channels. Click RGB to activate it. Now go to Layers tab and then select the Type Tool.
Step 5 : Type the text you want. I typed WRINKLED here. A new layer will be seen in the layers palette as a result (named WRINKLED). Right-click this layer and select Rasterize.
Step 4 : Switch back to Channels. Click RGB to activate it. Now go to Layers tab and then select the Type Tool.
Step 5 : Type the text you want. I typed WRINKLED here. A new layer will be seen in the layers palette as a result (named WRINKLED). Right-click this layer and select Rasterize.

 Step 6 : Time to apply the displacement stuff. Go to Filter>Distort>Displace… A dialog box appears. Leave all the values to their default settings and click Ok. You will then be prompted to open a file. Open the file we saved earlier (e.g., Map.psd). The Displacement Map has been applied here and a wrinkled text comes into view!
 Step 7 : Duplicate the above layer, set Mode to Overlay, and Opacity to 70. Merge all visible layers, then Save.
Here’s the final result as shown at the start:
Step 7 : Duplicate the above layer, set Mode to Overlay, and Opacity to 70. Merge all visible layers, then Save.
Here’s the final result as shown at the start:


Step 1 : Open the image you’ll be using for the text. Here, we’ll be using the wrinkled paper texture below. You can download the image HERE.


Monday, July 30, 2012
Chrome Text Effect in Photoshop
Chrome Text Effect in Photoshop
Here’s an easy, cool
chrome text effect everybody can learn in just a few steps mainly using the
layer styles. Here’s the preview of our final result – a Softlight and Screen
blend mode, respectively:


Background Preparation
1. Open a new document
(800widthx600height), fill it with black.

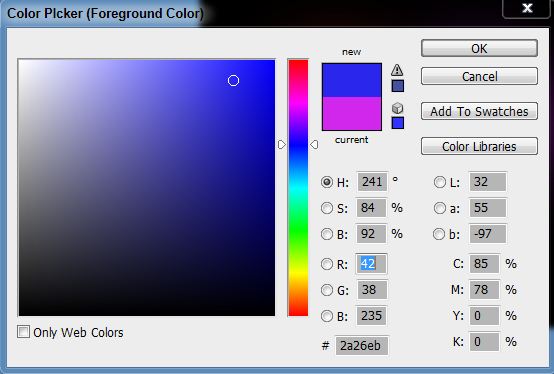
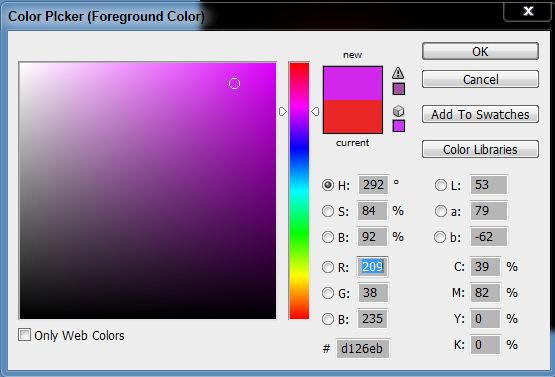
2. Pick your Brush
Tool (soft) and paint canvass in dots, horizontal arrangement, with the
following colors:


3. Apply Gaussian Blur
with the following settings:

Making the Text
1. Select a clean,
bold font that is clearly visible with the effects that we’ll make. I use a
Neuropol font here, size 72 pixels. Type the text onto the background we made
earlier. This is how it looks:

2. Duplicate this
layer if you want to. If not, it’s ok.
Applying Layer Styles
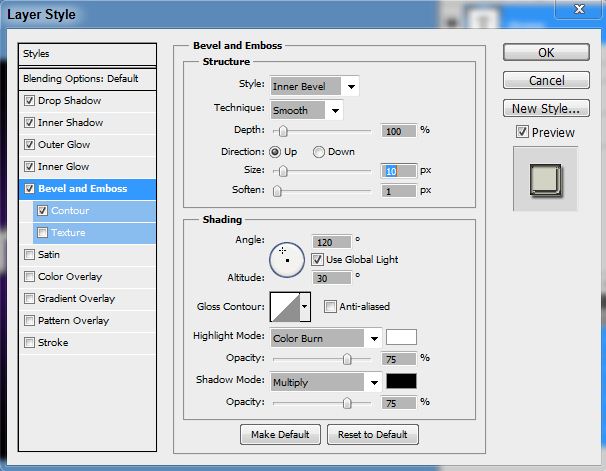
1. Right-click your
text layer on the layers palette and select Blending Options. In the dialog box
that opens, check Drop Shadow, Inner Shadow, Inner Glow, Outer Glow, and Bevel
and Emboss.
2. Done selecting the
layer styles above, it’s time to set the values in each layer style. To do
this, click each layer style one at a time beginning with the Drop Shadow up to
Bevel and Emboss (in order), then set the following accordingly:


Now, go to your layers
palette and change blend mode from Normal to your desired taste. There’s a lot
of possibilities here, actually. In this case, I just chose 2 – Softlight and
Screen. Save.
Options
You can change the
background you want. With the final image above, just paste it onto the
background you selected, then choose the mode that blends well with your text.
Here is another version of the above by changing the background and Blend Mode:

Overlay (Opacity :
100, Fill : 100)

Color Burn
(Opacity : 70, Fill : 50)
That’s it! Enjoy!
Subscribe to:
Posts (Atom)