Chrome Text Effect in Photoshop
Here’s an easy, cool
chrome text effect everybody can learn in just a few steps mainly using the
layer styles. Here’s the preview of our final result – a Softlight and Screen
blend mode, respectively:


Background Preparation
1. Open a new document
(800widthx600height), fill it with black.

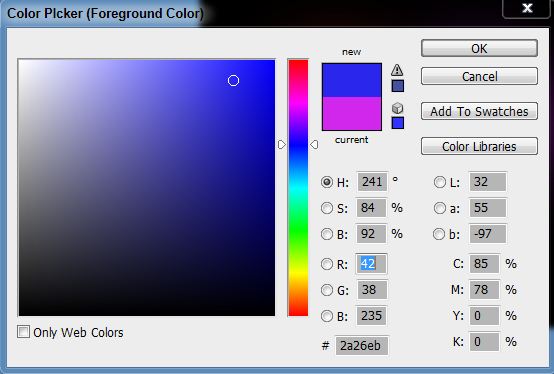
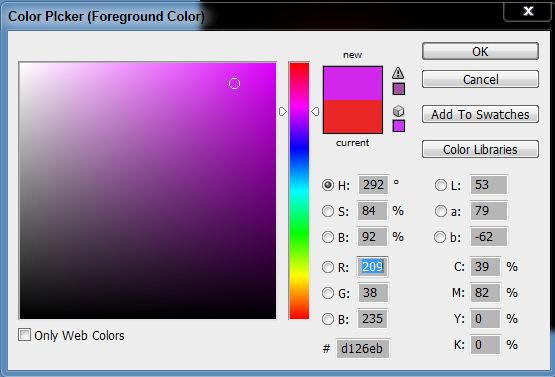
2. Pick your Brush
Tool (soft) and paint canvass in dots, horizontal arrangement, with the
following colors:


3. Apply Gaussian Blur
with the following settings:

Making the Text
1. Select a clean,
bold font that is clearly visible with the effects that we’ll make. I use a
Neuropol font here, size 72 pixels. Type the text onto the background we made
earlier. This is how it looks:

2. Duplicate this
layer if you want to. If not, it’s ok.
Applying Layer Styles
1. Right-click your
text layer on the layers palette and select Blending Options. In the dialog box
that opens, check Drop Shadow, Inner Shadow, Inner Glow, Outer Glow, and Bevel
and Emboss.
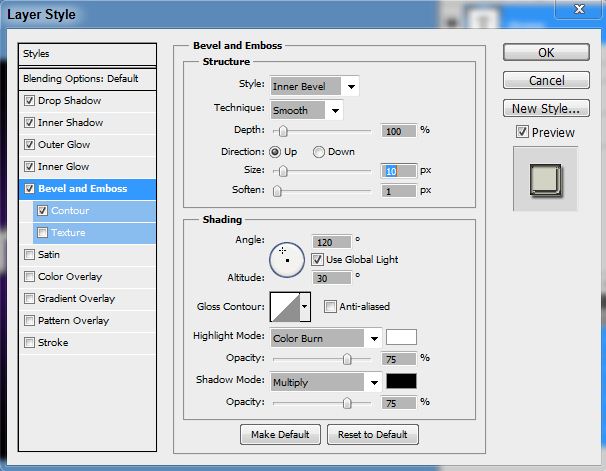
2. Done selecting the
layer styles above, it’s time to set the values in each layer style. To do
this, click each layer style one at a time beginning with the Drop Shadow up to
Bevel and Emboss (in order), then set the following accordingly:


Now, go to your layers
palette and change blend mode from Normal to your desired taste. There’s a lot
of possibilities here, actually. In this case, I just chose 2 – Softlight and
Screen. Save.
Options
You can change the
background you want. With the final image above, just paste it onto the
background you selected, then choose the mode that blends well with your text.
Here is another version of the above by changing the background and Blend Mode:

Overlay (Opacity :
100, Fill : 100)

Color Burn
(Opacity : 70, Fill : 50)
That’s it! Enjoy!
No comments:
Post a Comment